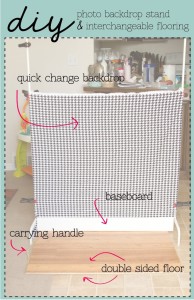
I hate my floors in my house – I have since the day they were installed. It’s a long story and clearly after 4+ years, I still harbor negative feelings about it – but alas I have found a solution for taking pictures in my home that do not include my floors. It also works great because I can transport it to client homes and is very inexpensive compared to what I could have purchased ready made.
I have seen a lot of things like this pinned on Pinterest and was tempted by a PVC pipe set up but I wanted something that would look a little more professional and polished since it may not always be for personal use. I love the final product!
Here is how I did it and the supplies I used:
Ikea Mulig Clothes Rack
Particle board 37″ x 24 ”
Vinyl peel-n-stick flooring
Rope
Staple Gun
Sand paper
Polyurethane (I used spray but a can and brush will work as well)
Clamps
Baseboard cut to fit the length of the clothes rack
Fabric, blankets, etc. to use as backdrops
Sand down the particle board to remove any loose pieces and avoid splinters. Spray a coat of polyurethane, especially on all of the sides and edges and let dry.
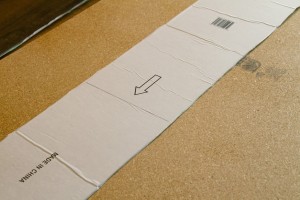
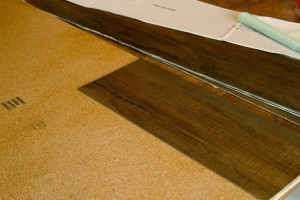
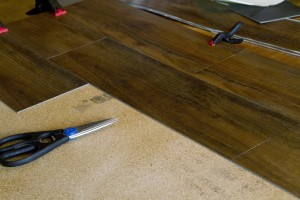
Once dry begin cutting your vinyl flooring. Do one row at a time, fitting each piece together like you would real wood boards you would install for flooring. Use a straight edge to mark where you want to cut the flooring. You can use a utility knife on the back of the board and bend it to break – but what I found was easiest, was just to use my kitchen sheers and cut as straight as possible.
Start laying the the boards. Put each piece as close to the other as possible and press down for a few seconds before moving to the next piece.
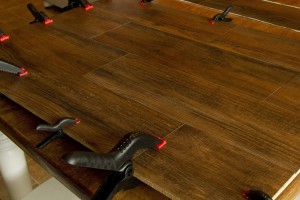
Continue around the board. I used clamps to keep the pieces in places as they can move around until they have had a chance to really stick.
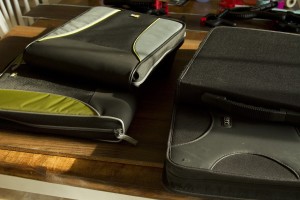
Once the board is covered, put some weight on it and let sit for about 24 hours to keep all of the pieces in place. My husband’s extensive CD collection (this is only a small portion of it) helped on this project.
If you want to have some variety, you can use a second flooring type on the other side, like I did. Just repeat the steps. Attach some rope on either side or both of the board for easy tote-ability (I swear that’s a real word!) You could even have multiple boards and have tile, hardwood, etc.
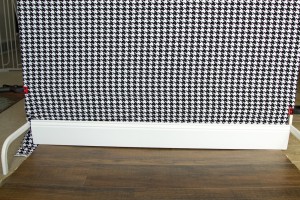
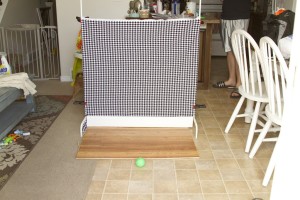
Take your backdrop – I used scrap fabric I had around – and clamp it tight leaving a little on the bottom for the flooring to sit on top of. Stand up the baseboard at the edge of the floor and you are set to start shooting. This changes the look of any room you are in.
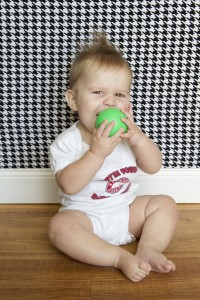
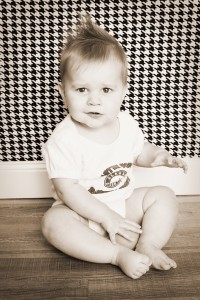
The houndstooth is a bit busy for everyday pictures but it goes with Reece’s Alabama shirt and helps to illustrate the difference a backdrop can make to photos.
These pictures, of my beautiful live-in model, were all taken in about 10 minutes. A quick change of clothes, a little hair gel (or baby lotion) and a flip of the floor and background make a totally different scene.
You don’t even need to have a clean house, this hides everything! I am so excited to get some great use of this bad boy!
This works really well for small subjects, like babies and kids. You could do an even bigger board to make the flooring extend out – it is all about what you would use it for and your budget of course! You can also put a backdrop all the way to the top of the rack and not worry about the flooring, to end up with a nice sitting portrait studio. Since I used fabric scraps I had for the backdrop, they didn’t extend the entire height of the stand.
One last picture of my cute little guy! You can see his two bottom teeth a little in this! I can’t believe he is already 10 months old and I need to start planning his first birthday celebrations!!! Fun times in our family right now! Thanks for reading!







Leave a Reply