I love string art. I was really intimidated by it at first and thought it would take a ton of time but after my mom visited earlier this year, she enlightened me and gave me some tips. I’m going to share those today in this How To Make String Art tutorial.
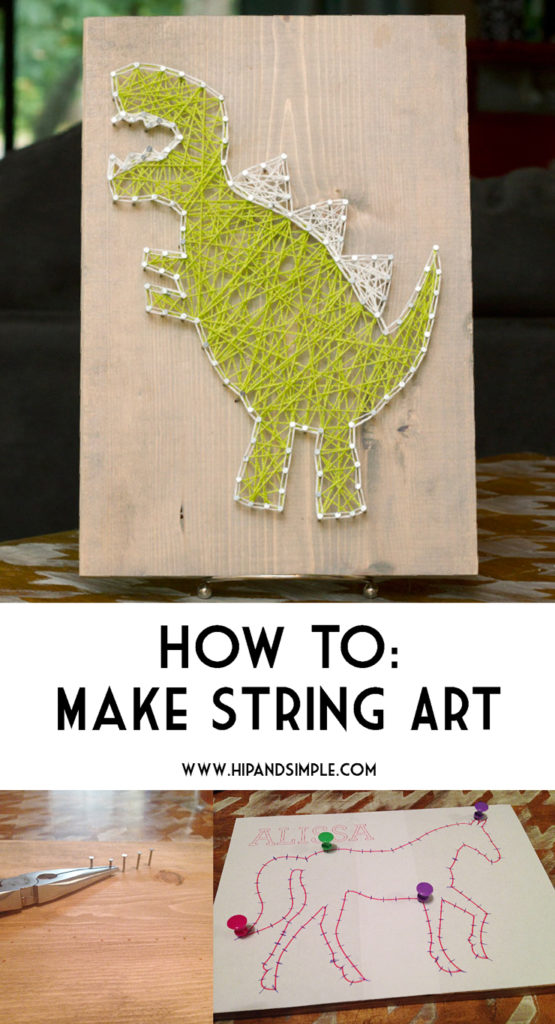
I’ve done a bunch of these now, both for my etsy shop and for personal gifts.
Here is what you are going to need:
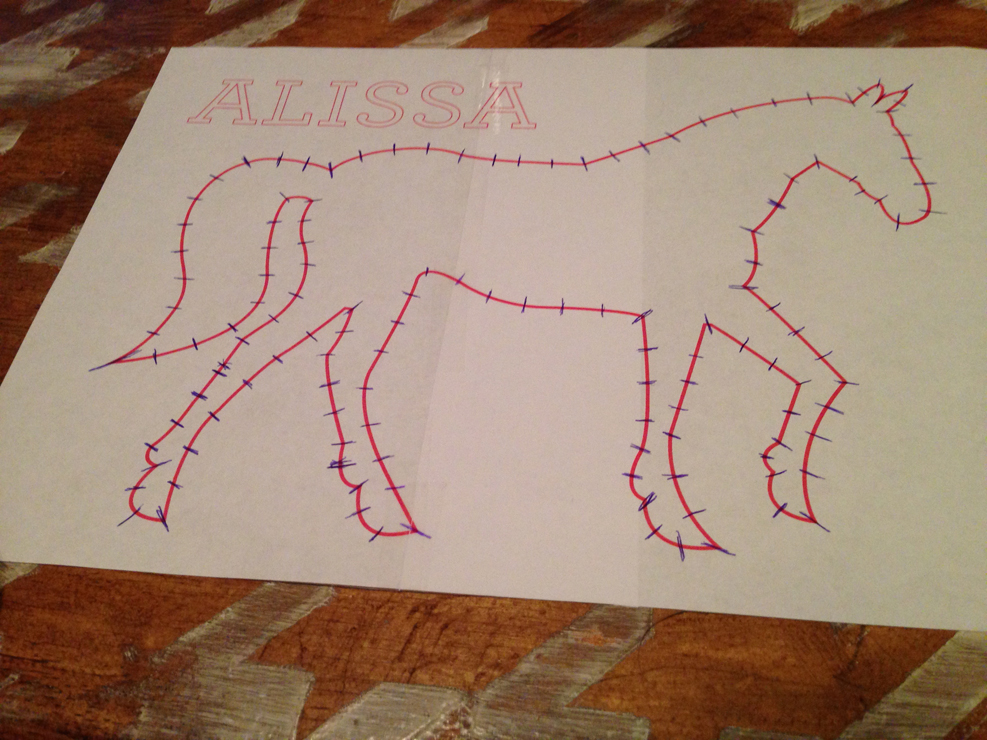
- Line design of lettering or a shape you like. I drew this horse out in Adobe Illustrator and printed it out on regular copy paper. You could freehand this or make something on your computer. My board was bigger than the paper so I had to tape the design together on two sheets.
- Stained or painted wood board (use pine if staining. MDF will work but is a little tougher to handle the nails)
- Wire nails
- Very large thumb tacks (at least 5)
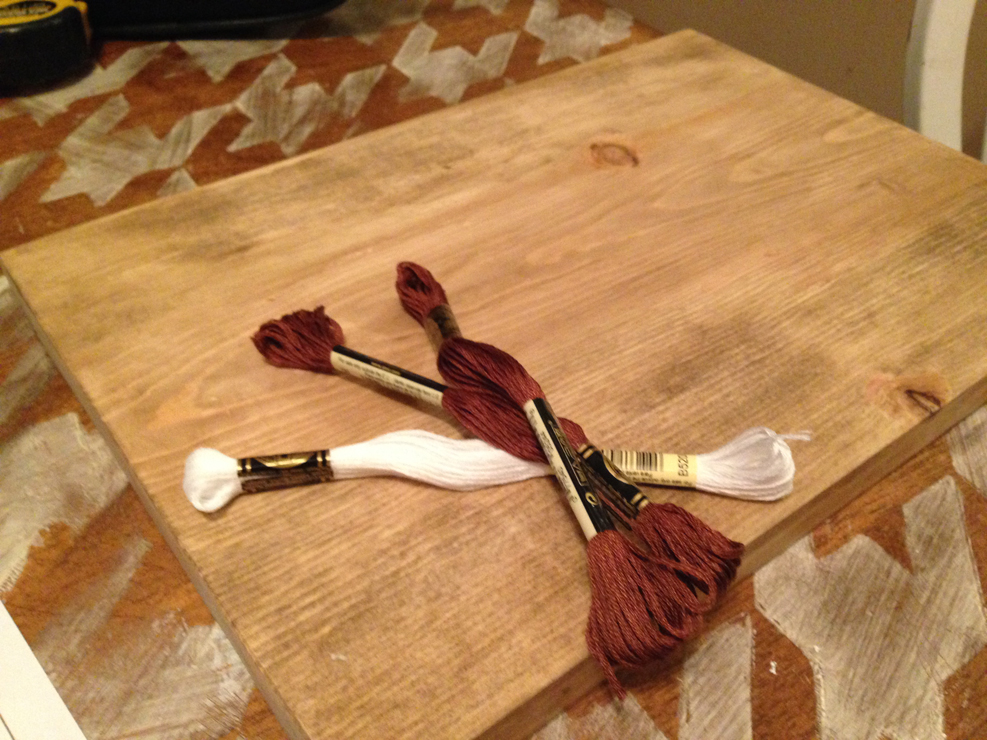
- DMC floss or crocheting string (thinner string is easier to use. When using multiple colors, be sure they are the same thickness so they have a cohesive look on the piece)
- Tacky glue
- Hammer
- Needle nose pliers
- Measuring Tape
- Pen
- Sawtooth hanger (optional – for hanging the board)
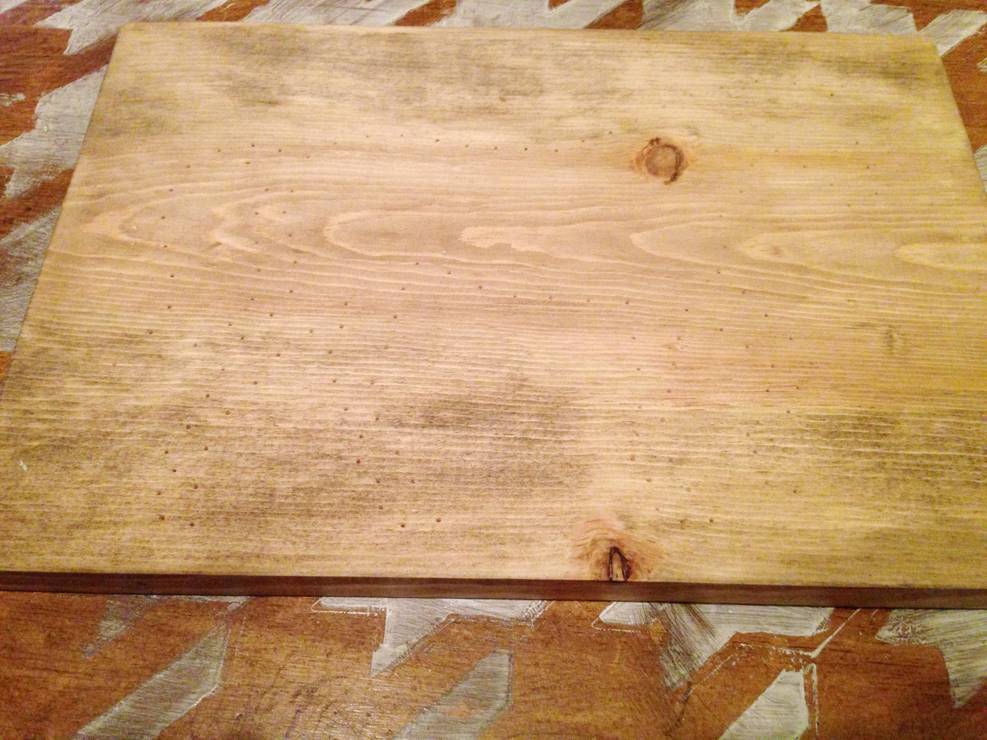
Start with a stained or painted board for your base. On your printed shape or letters, take a measuring tape and your pen and mark of every 1/2″ or so. Be aware of corners and be sure they have a mark on them, you may need to adjust the 1/2″ to account for those. I could have done this on the computer but it was faster to do it this way on this one.
When you have finished that, figure out where you want to layout the design on the wood. Take into account where knots are in the wood. Avoid the marks on your wood hitting a knot. If you hammer a nail into the knot, it will increase your chances for the wood splitting.
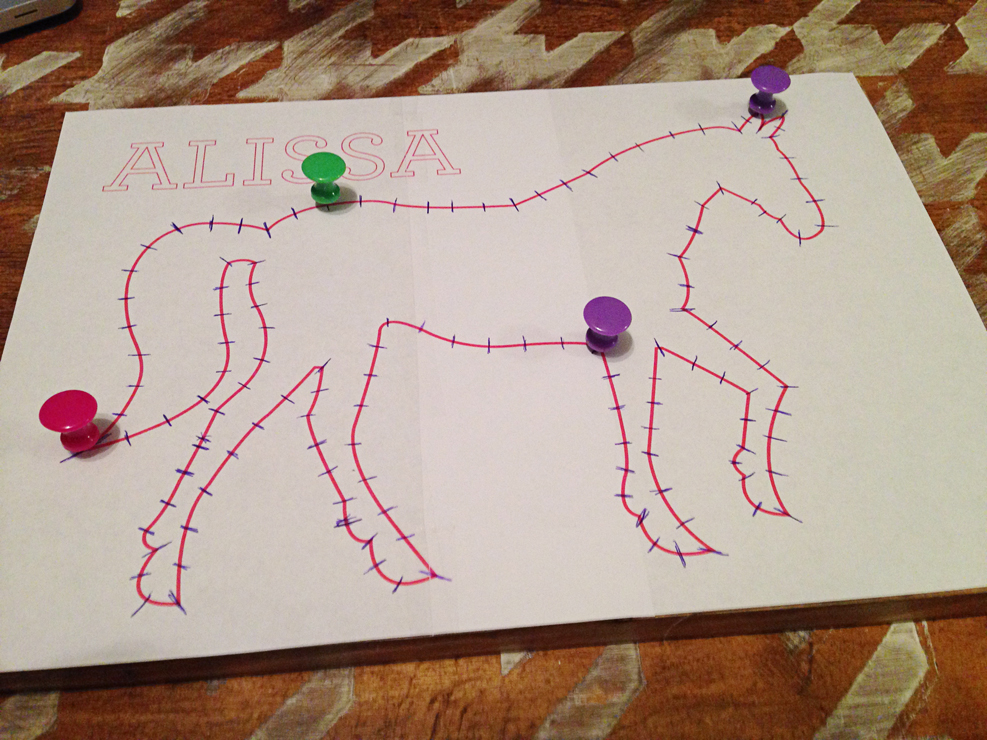
Once you have it where you want it, place 4 of the thumb tacks on the design to hold it in place while you work.
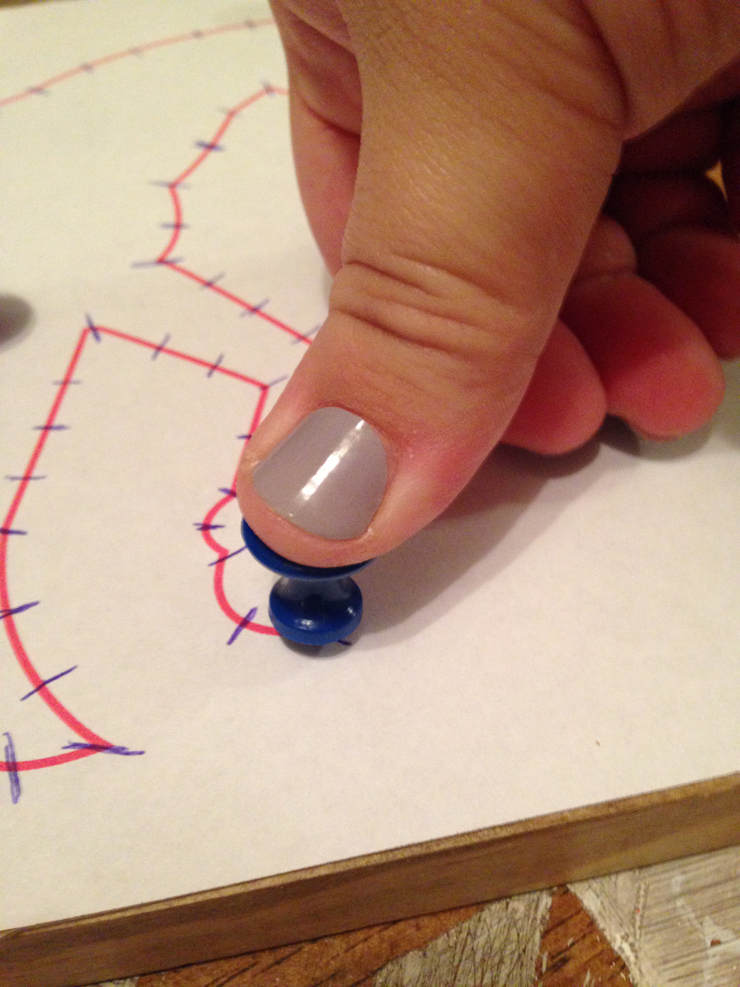
Then you will work your way around with your other tack to press it in on all of the marks where it intersects the line of your design. Press these holes in as far as and as straight as you can. These holes work as a pilot hole for the nail and make it much easier for the nail to go in and avoid splitting the wood. I’m not going to lie, this will wear on your finger a bit and your thumb will hurt. Alternate fingers and go slow.
Once you have made all of the holes, remove the tacks and paper to reveal the design.
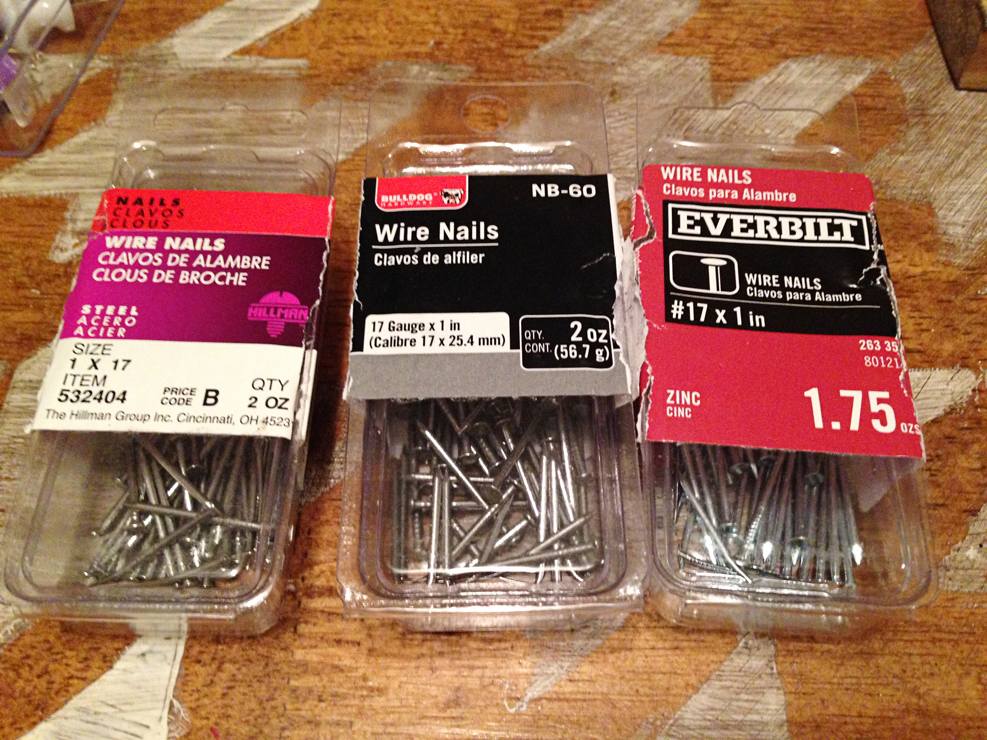
These are the types of wire nails I’ve used before from Walmart and Lowe’s. Each one has a slightly different head size and even a little different coloring so be sure to use the same type of box for your whole design. Before I begin hammering, I count out the holes on my design and make sure I have enough nails to finish. Not that I would know or anything… but it sucks when you run out and aren’t finished!

Then make your way around the design, hammering in your nails. Pay attention to ensure the nails go in straight and are each in the wood at the same depth. Use your needle nose pliers to straighten them as you go or pull them out of the hole as needed. It’s easier to do this as you go then all at the end.
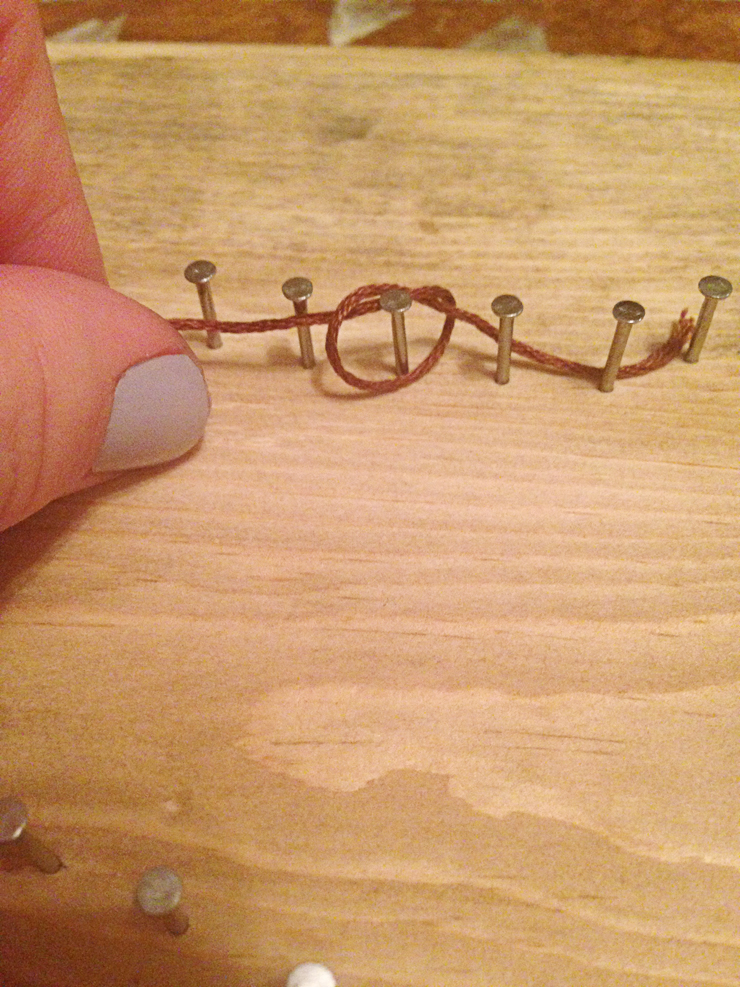
Once you have all the nails in, you are ready for the string. Tie a knot around one of the nails on the top.
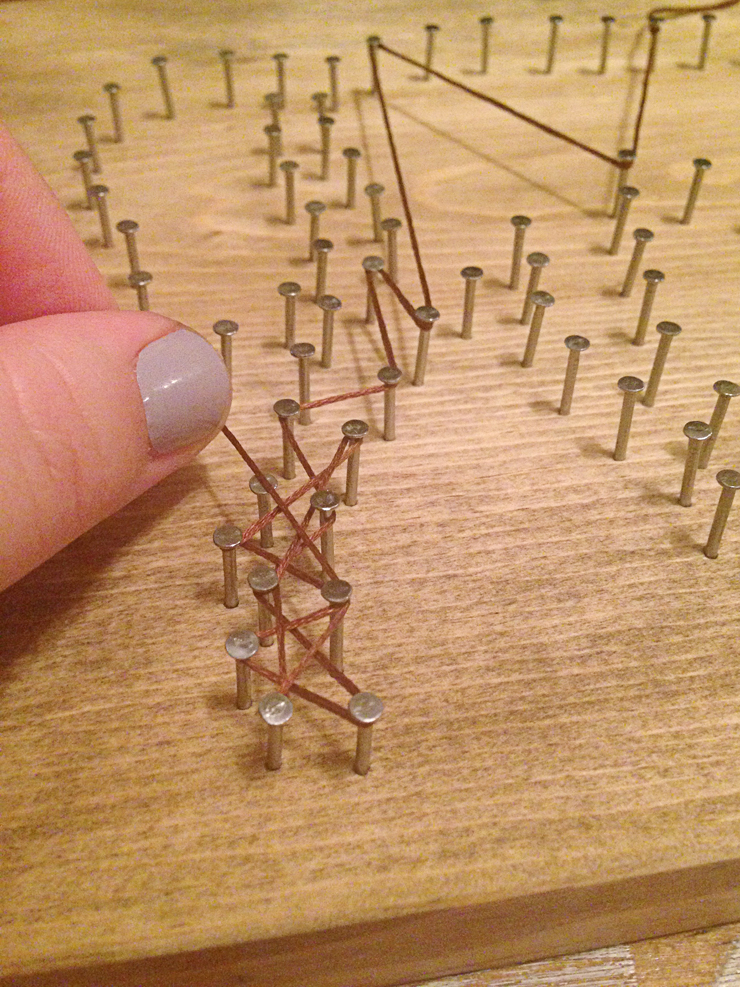
Then start randomly wrapping your string around. I make sure to go in all directions and ensure that each nail has at least one wrap around it. Keep it tight and go slow. The string can pop off one nail and come loose. Then you’ll have to redo a bit of it. Once you have finished, tie the string off on another nail at the top of your design. If you have a second color of string in your design (like the tail on this), you just repeat the same process.
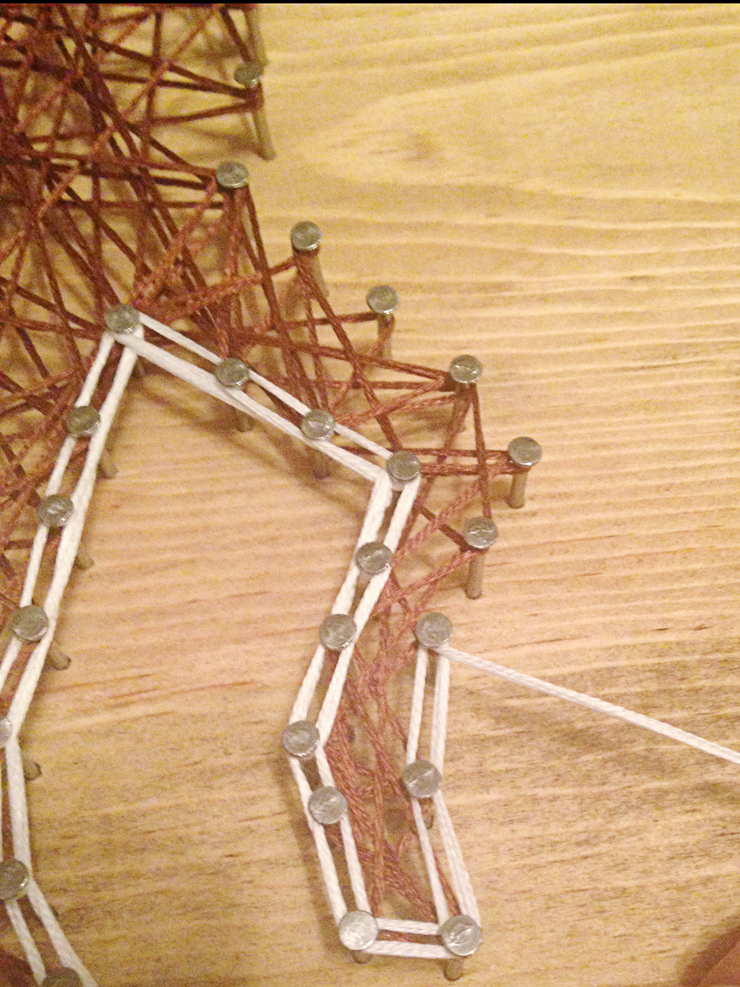
You can leave the nail edge as is but I like to do a border around the edge. Sometimes I’ll do it in the same color as the design but since the tail was white I just continued that around the edge. Just loop the string around each nail head and make your way around.
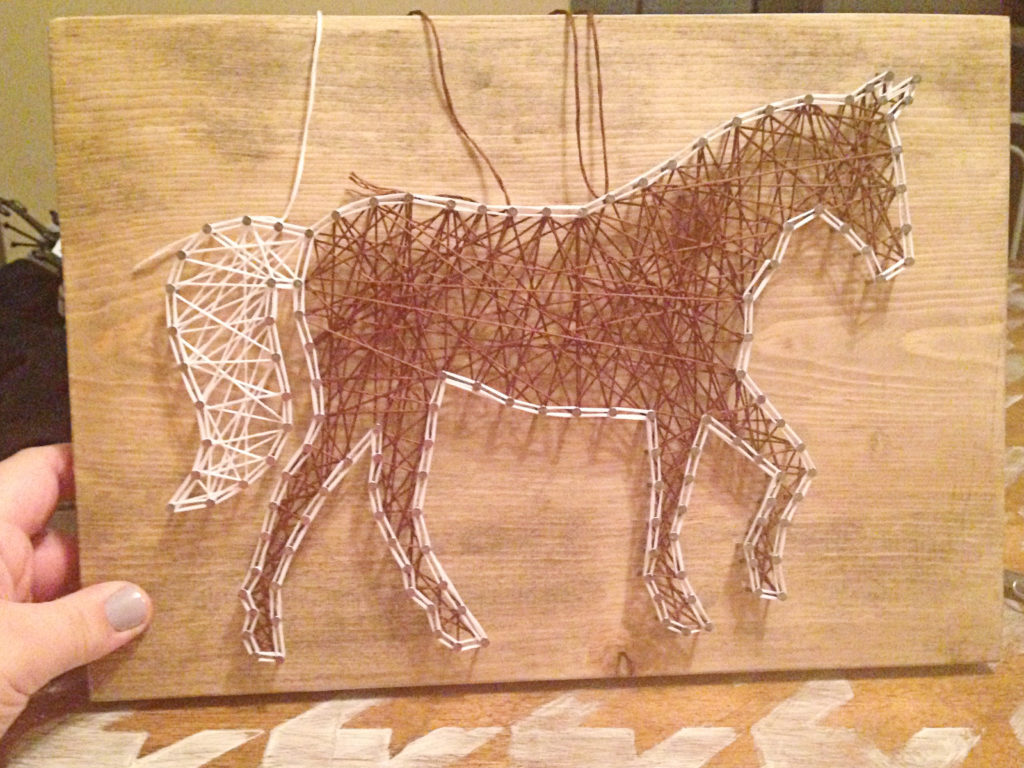
Tie off your ends when you are done. Step back and double check that there aren’t any big gaps or too heavily stringed areas on the design. When it is done, trim your tied strings.

Then you’ll need your tacky glue to hide those tied ends.
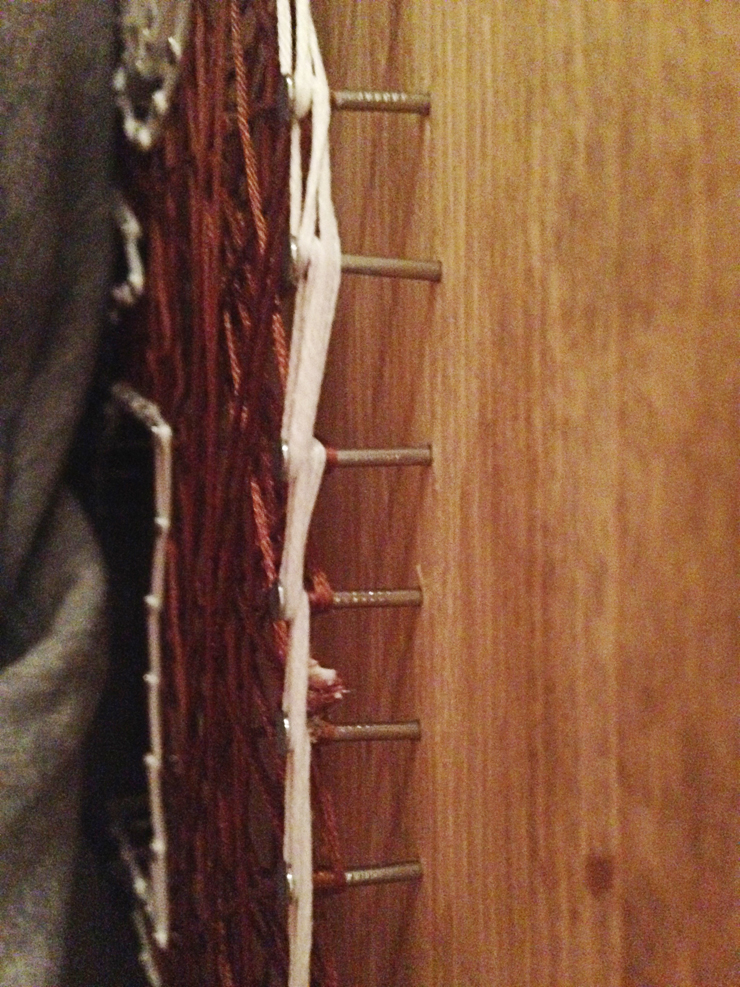
Put a little dot on the ends and then shove it under the design. The glue will dry clear. If you are adding a sawtooth hanger, you can add it on the back now. It is a little tricky because you don’t want to alter the nails so just be careful.
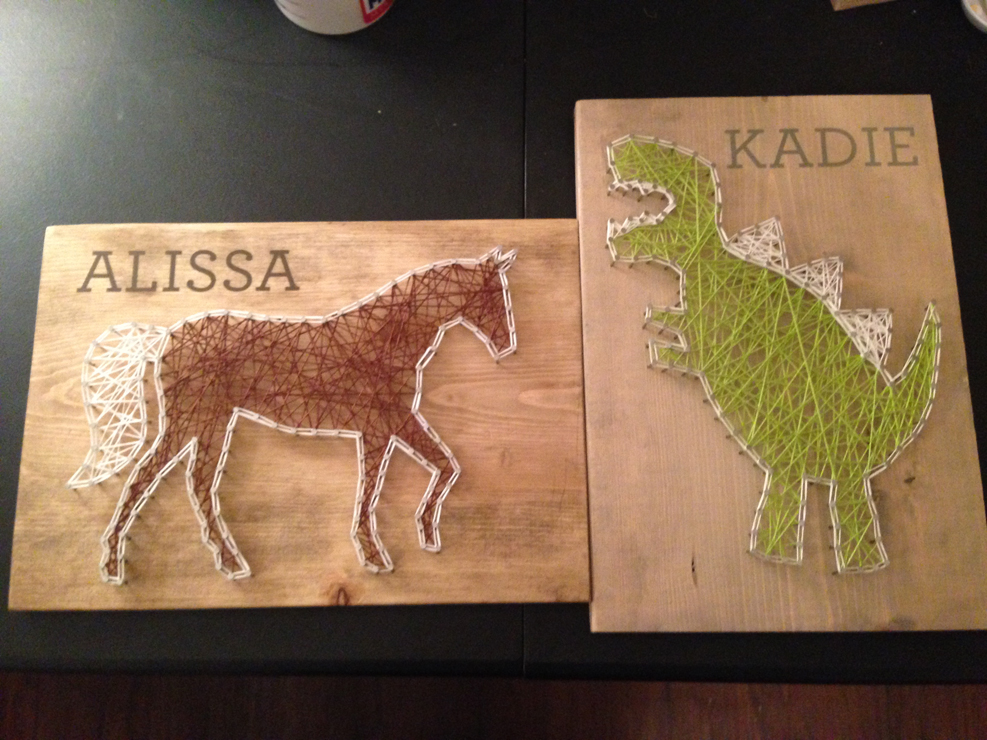
I made these two, custom for a client. I made a vinyl stencil to paint the names on at the end.
This may seem like a lot but it’s only about 20 minutes of work. It’s really easy to get the hang of. I’ve seen and tried a few other methods but this is the easiest and gives consistent results. You can do this with names in your favorite font or any shape you can draw up. They can make really nice custom gifts for friends or for your own home decor. I’ve got a few other designs in my shop.
Have you ever tried string art? How did it turn out for you? Any tips you’d add?


How can I get the template of the dinosaur you did with string art?
Hi Dannelle, I actually freehanded that one on a piece of paper, it’s the first string art I have ever made. I’ll have to add this to my list to recreate and make a digital file but I’m not sure when I’ll get to that. I’ll update here when I have had a chance. Thanks! Jessika
Where is a good place to get the board to make these?
Hi Amber! You can use any type of wood but I’d recommend either common board wood from Lowe’s or Home Depot or you could even pick up a precut wood plaque from any craft store or even Walmart. You need it to be thicker than 1/2″. I’ve used MDF before but it’s not as easy to work with when you have to hammer in all of those nails, so I’d avoid it if you are new to it. Hope that helps. Let me know how it goes!
Thank you so much. I’ve been wanting to try string art but have not found a detailed how-to until now. This is so helpful.
Glad it was what you were looking for Sara! I’d love to see what you end up making. Let me know if you have any questions.
Yes- thank you for this very thorough tutorial. I too have been wanting to try string art but didn’t know how to get started. Great post!!
I’m glad this helped you! Thanks for letting me know
My string pops off easy if I relax for a bit. Any ideas to prevent this?
If you are going to rest while working on it, I’d wrap it around a nail head so it doesn’t come loose. Otherwise you really need to hold it tight so it doesn’t pop off. My fingers will cramp slightly on more complicated or larger designs so I tie it off and shake them out a bit before starting up again. I hope that helps!
Excellent thanks I think I might be able to do this now. Very impressed
Of course you can! It really isn’t too hard once you get started. The prep work helps a ton!
This was super helpful! I’m in the process of a few designs (Yoshi, Sonic and Pikachu), but after I put the nails in for the boarder, I was unsure how to get the inside details from my template. I would have never thought about using a thumbtack to get the holes in place. Genius. Thanks so much for the tip!
How far did you place the nails in the board? I made one but it seems like there is a lot of dead space between the board and the strings.
About 1/4″ inch. There should be some nail still sticking up, it gives some good depth to the piece. I hope that helps.
Do you have any arizona templates
Would it be ok to tie off as you go through your design? I have pretty severe carpal tunnel but I still want to do this. My mom made my brother a Galaxy when we were kids and I’ve always wanted to try this. Thank you, thank you, thank you.
I don’t see why not. Give it a try and let me know how it goes!
Hi Jessica
I have been inspired by your very easy ‘user guide’ !
I am sure this is a new ‘project’ for me to enjoy and I will recommend your page to my friends
Thanks
Sharon
This is an awesome tutorial thank you so much! I too have been wanting to do some string art but lacked confidence to try it, plus I have tons of scrap wood to play with! Love the step by step guide with pictures.
Thank you again!
To ‘save’ your thumbs making pilot holes: work the thumb tack through one end of a pop cycle stick, (add a drop of glue for extra security). Holding opposite end of stick, position tack over mark and use hammer to gently tap the tack into the wood.