• Home
  • Blog
    • DIY
      • Kids
        • Baby
      • Gifts
      • Home
        • Decor
        • Organization
        • School
        • Party
      • Wood
    • Recipes
      • Dinner
      • Quick & Easy
      • Side Dish
      • Dessert
    • Photography
      • Children
      • Couples
      • Family
      • Wedding
      • Misc.
      • Tips & Tutorials
    • Holiday
      • Christmas
      • Halloween
      • Thanksgiving
      • Valentine’s Day
    • Printables
  • PORTFOLIO
  • ABOUT
    • Hip & Simple | Jessika Reed
    • Artist Statement
    • Creative Links
  • CONTACT ME
    • Facebook
    • Google+
    • Instagram
    • Pinterest
    • Twitter

Hip & Simple

Creativity for Everyday Life

Bakery Sign DIY Farmhouse Decor

July 13, 2016 by Jessika Leave a Comment

We may earn money or products from the companies mentioned in this post. See our full disclosures, TOS, and policies for more information.

I’ve mentioned before how we live in a small apartment. It’s also old and it’s a basement unit so it’s dark. BUT that doesn’t mean that I can’t add things that make me happy. I came up with this easy and inexpensive Bakery Sign DIY Farmhouse Décor.

Print

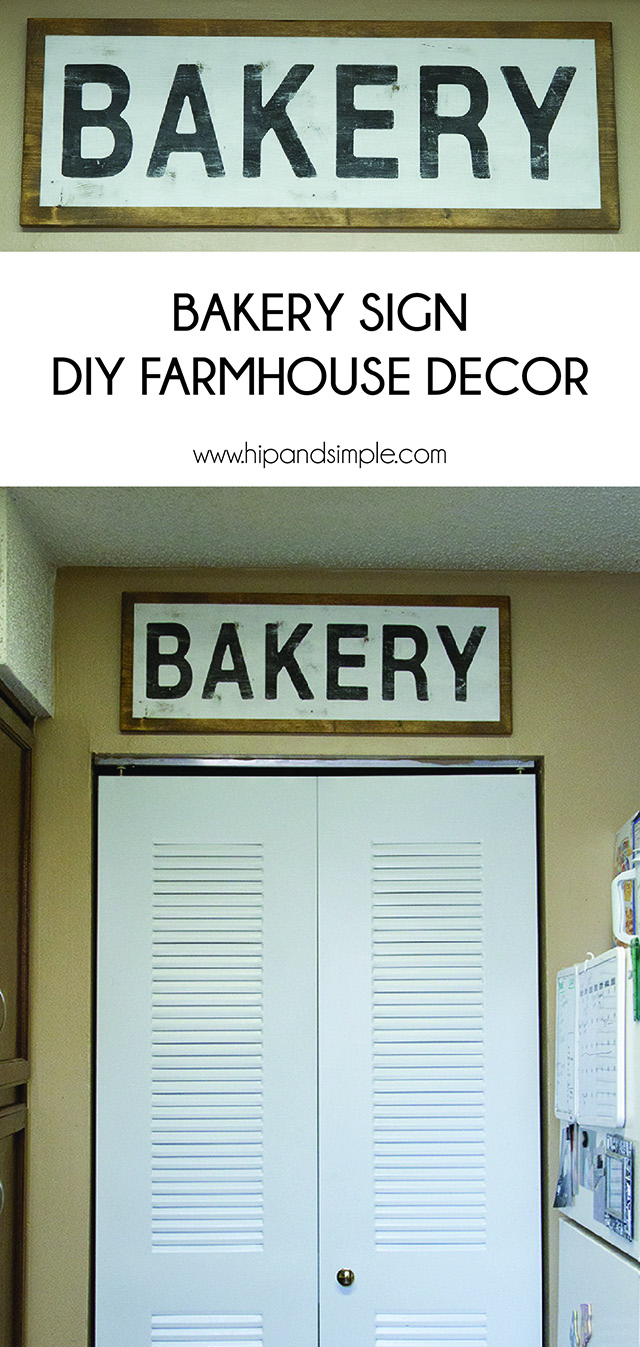
Unfortunately, since we rent, we won’t be ship lapping the walls or updating the paint. I’d love to take off the popcorn ceilings but we live with it and it works. But I wanted to get some more things on the walls and update some of our décor. I’ve been wanting to make a farmhouse style sign and came up with this bakery sign DIY farmhouse décor and love the way it turned out.

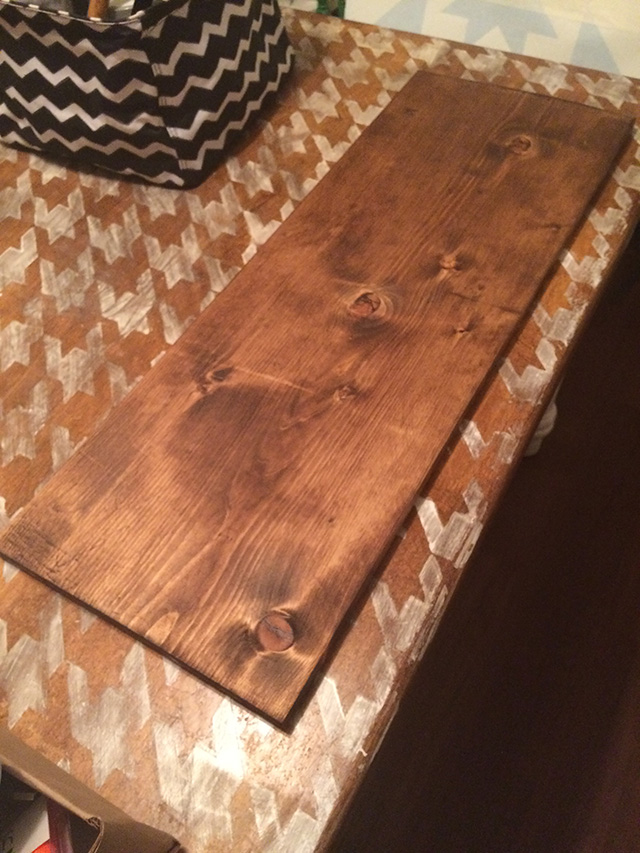
I took a 12″ x 24″ pine board and stained it a dark color. I love Early Americana by Minwax.

Bakery Sign DIY Farmhouse Decor - Stained Board

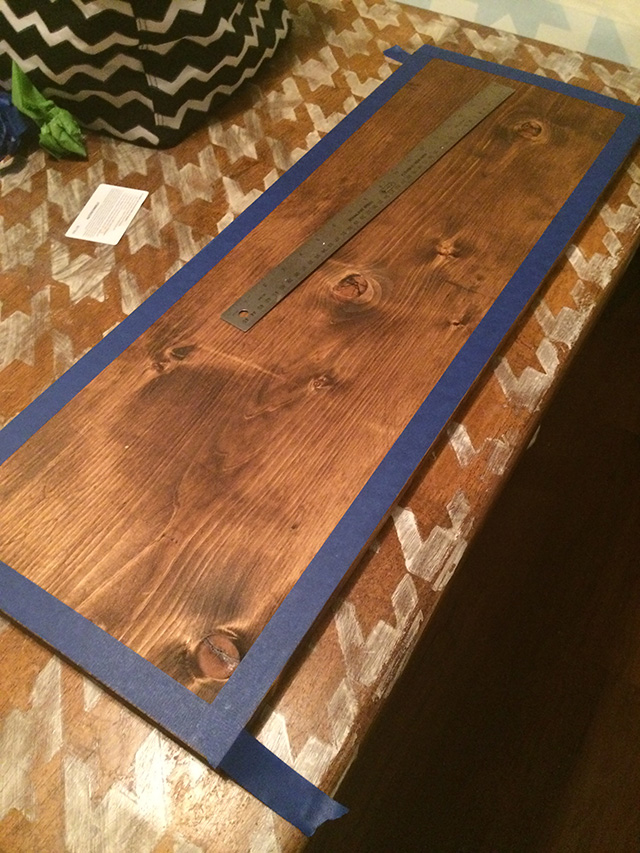
Wait until the stain is really dry. I like to set it outside and wait for a couple of hours. Then I used 1 inch painters tape and taped off the edges of the sign. Press down the edges really well. I like to run a credit card over the tape to really seal it to the wood.

Bakery Sign DIY Farmhouse Decor - Taped Board

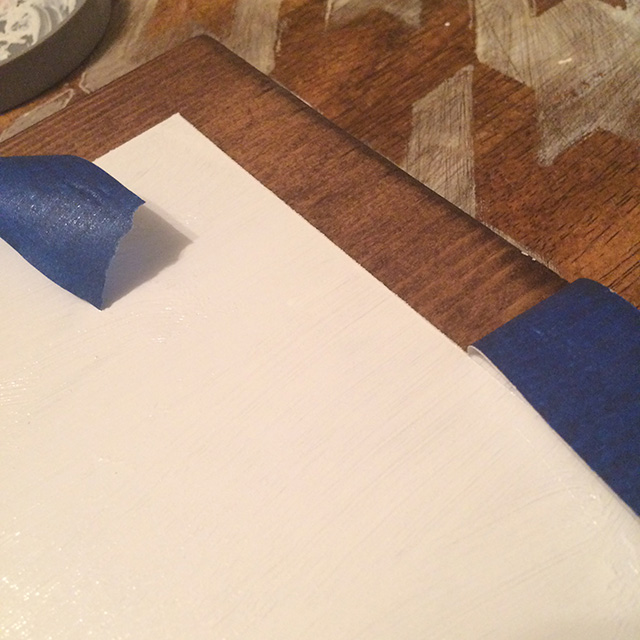
I then painted on two coats of white paint until it was well covered. While the paint is still a little wet, peel the tape off. I love a crisp line.

Bakery Sign DIY Farmhouse Decor - Peeling tape

I used my silhouette cutter to make a vinyl stencil using a san serif font but I’ve seen these in more traditional serif fonts and they look great. I just kept it simple and filled the space with the letters.

Bakery Sign DIY Farmhouse Decor - Stencil

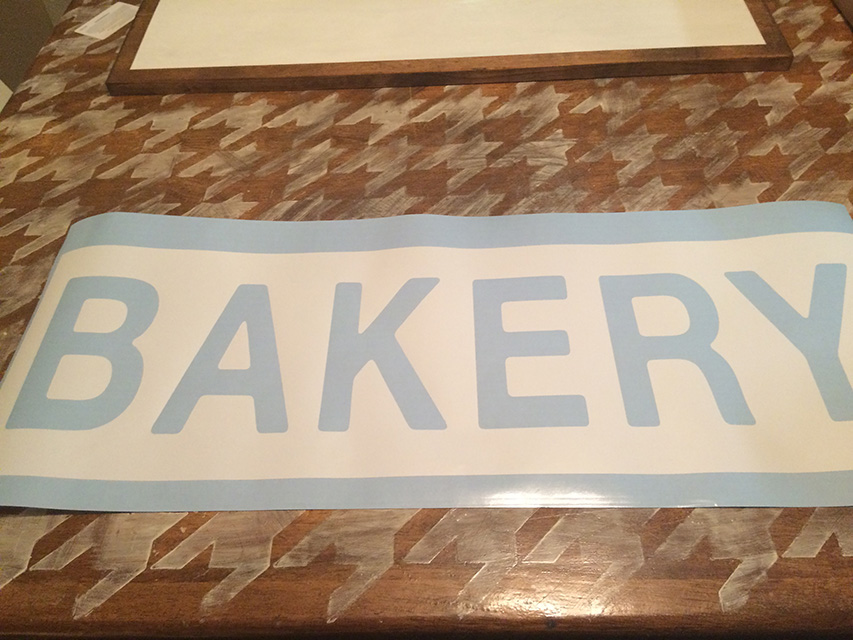
I applied the stencil to the middle of the board and painted a thin coat of white paint over the letters. When that was barely dry, I painted black over the letters. While the black paint is still a little wet, I carefully pulled off the stencil. Once it was all dry, I scuffed everything up with sandpaper. I wanted the white to be bright so I just let the stain show through instead of adding more on the top and risking the white going too dark.

Bakery Sign DIY Farmhouse Decor - Final

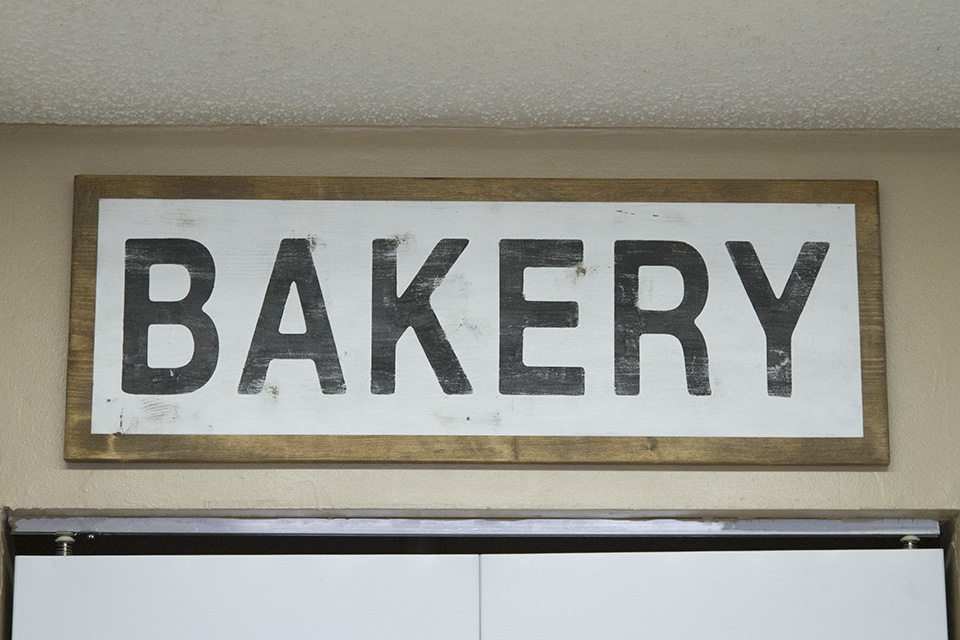
I added two sawtooth hangers 5 inches in from both sides. I then put a piece of painters tape on the back and marked where the sawtooth’s were and where the middle of the board was. I then took the painters tape off and hung it on the wall and hammered nails into the sawtooth markings. I then hung the board right on top and it was perfect. I didn’t want to risk this sign falling on any of our heads so I used the two hangers to be safe. It’s very sturdy and has withstood my shaking and taping and hasn’t moved but it is very easy to remove when I want to update the space or if we move.

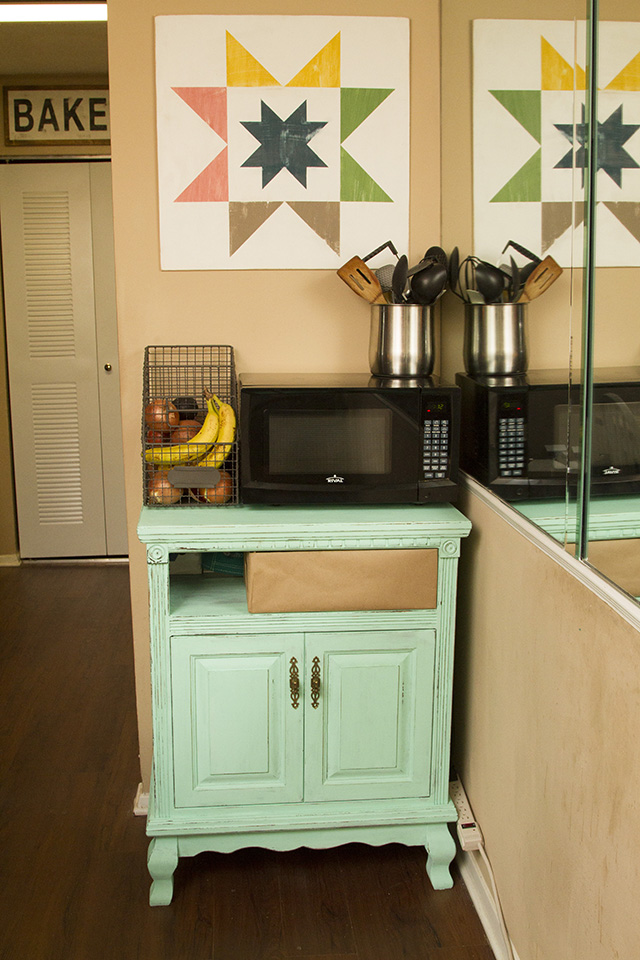
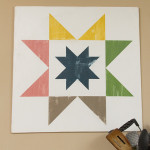
It looks so great with my DIY Upcycled Kitchen Cart and Quilt Block Wood Painted DIY Decor in our kitchen / dining area. The best part, the sign was made from scraps and was free in the end.

Cabinet Final

More from my site

  • How To Make String ArtHow To Make String Art
  • Quilt Block Wood Painted DIY DecorQuilt Block Wood Painted DIY Decor
  • Changing Table Converted to DeskChanging Table Converted to Desk
  • $5 Picture Clip Display$5 Picture Clip Display
  • DIY Clip Board DisplayDIY Clip Board Display
  • $10 DIY Baby Mobile$10 DIY Baby Mobile
Farm Horse Pictures – Trussville, AL
Toddler Birthday Pictures – Libby is 2

Leave a Reply Cancel reply

Your email address will not be published. Required fields are marked *

get our newsletter

Categories

Featured

… [ Read More ]

… [ Read More ]

What My Clients Are Saying

  • I needed a rush printable for a sponsored post and Hip and Simple was able to help me and provide such a cute product. My new favorite!

  • We trusted Jessika with our wedding and she did a great job. I love reliving our big day through her photography.

  • My family showed up to our photography session grumpy. I was stressed and worried we wouldn't get the pictures I was hoping for. Jessika worked with my kids (and husband) and the pictures were great. She was able to capture their personality and great family photos for our living room and holiday cards.

  • I've used Jessika for a few different flyer designs and she produces fresh, modern designs that fit exactly what I need. She works well for my timeline and budget. I look forward to working with her more in the future.

  • I've used Jessika for many different design jobs; printables, website button design, newsletter design, ebooks, etc. I love her turnaround time and quality.

  • Easy to work with and flexible. Does a great job of capturing my vision and creating printables that I can offer my readers. A great resource for design but also research, newsletter design, ConvertKit, social media, WordPress, virtual assisting, etc.

  • Jessika, you make my life too easy!!! You are great to work with on design, web and even personalized wood gifts. Thank you!

Newsletter Subscription

75 jessika@hipandsimple.com
xo Jessika

© 2019 · Pretty Creative WordPress Theme by, Pretty Darn Cute Design